I never really got over my childhood fascination with little figurines - toy soldiers and the like. When I was playing D&D in middle school in the 80's there was just something mystical about those little Ral Parth and TSR figures that fascinated me. After years of casual gaming, I realized I finally had some space and time to get back into miniatures. Compared to the average person I might seem hardcore, but in the miniatures realm I'm really only a casual participant.

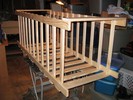

 It occurred to me that one area I had left to me in my cramped garage was vertical space. I kept working over this idea of a simple system of horizontal slats onto which I could slide plywood sheets, allowing me to stack them all into a secure cabinet. I could create detailed dioramas that wouldn't have to be dismantled over and over every time I had to do something in my garage. So in a mad-scientist frenzy I picked up a bunch of wood stripping and screws, retreated to my garage, put on the Dark Knight soundtrack, and went to town.
Four pieces of 1x3x6 served as the posts, onto which I measured out 6" increments. Next, I cut 2' long pieces from the 1x2x6 strips and screwed them into the posts at every 6" increment, making the whole thing look like a pair of ladders. I then stood the two 'ladders' up and, after making sure they were square (harder than you think!) I attached them together with horizontal bracers in front and back. Three coats of varnish and a set of casters and the unit is ready for easy use!
The cabinet is 6' tall with 2' wide x 2' deep berth and slats running into it at 6" intervals, allowing me to buy pre-cut 2' x 2' sheets of wood, mount whatever I want to them, then slide them in and out of the cabinet to keep them safe. If I build something really tall I just remove one of the sheets to offer more clearance.
Behold, some of my nerd projects to go into my cabinet...
Dungeons and Dragons
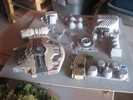
Here are projects I'm working on for D&D minis. I love using found material to create dioramas. Here I have a piece of styrofoam packing material from a printer cartridge. I prime/paint it with water-based gray then give it a stain/wash with watered down black paint, allowing it to seep into the cracks to create an aged look and make the surface appear like cobblestones. Nothing fancy, but it looks pretty good for what I have to work with. Which is FREE!
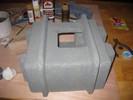
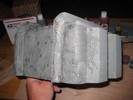
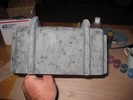
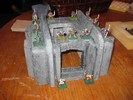
Got a little crazy on vacation ordering new minis - wanted stock for low-level encounters, so I stocked up on a lot of ugly goblins and their cousins. Notice the castle tower has a good stain to it now.
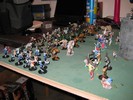
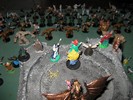
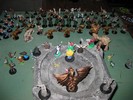
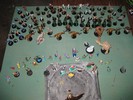
This is another just thrown-together bit where I can just get the figures out to see how they'll look. I'll have a castle wall or dungeon theme set up soon to pit these two forces against each other. I'd love to construct a massive dragon horde chamber one day... ah, retirement is looking good now. :)

Battle Mat
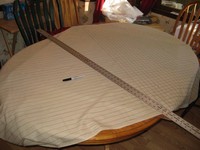
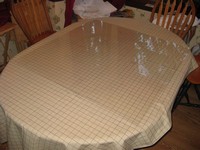
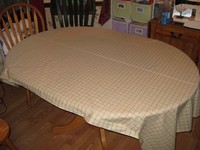
Chessex and other companies charge an arm and a leg for tiny battle mats measuring maybe 3' square. They're nice vinyl with good earth tones and are usable with dry/wet erase markers (for a while anyway, when they age the marks are hard to clean off). I got frustrated with my groups having to carefully plot the action on the tiny mat, always running out of room. I also didn't like having to roll it up and find a place for the mat with my other gaming stuff - a long tube doesn't fit in with boxes of figures and books. So my idea was: why not have a textile mat that you can just lay plexi over? Sure, the plexi is hard to carry but we were using it anyway for the vinyl mat.
When I thought of just drawing sharpie lines on cloth, my wife suggested something all cotton like muslin. I found tea-dyed muslin for $2.50 a year at wal-mart, bought two yards of it, and spent about a half an hour figuring out how to best lay the lines and how to lay the first line every other line would have to be drawn off of. I made a lot of mistakes, the ruler kept slipping, my measurements weren't always precise enough... but enough grids put together and they look great. So here is my first ever home-made battle mat measuring 45"x72" and easily stored by folding it up. With time it should end up just looking even more ancient and therefore still cool, but also still functional. Not bad for five bucks.
Star Frontiers
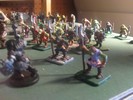
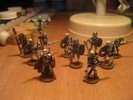
Star Frontiers was a game in the 1980's that TSR never took proper care of. Well I still have a lot of my old figures: the four races Yazirians, Dralasites, Vrusk, and Humans versus the sneaky Sathar and their agents (lurking in the background behind the bushes). I don't have much to use, so random bits of packing materials make for some good props in the meantime.

Axis & Allies
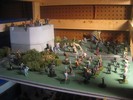
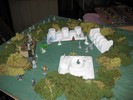
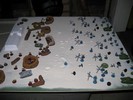
Hell yeah - Axis and Allies figures finally get some proper use! Here is my early early very basic attempt at a D-Day mock-up using what I had on-hand and a bag of sand left over from a school project. Some accidental finger prints made for interesting impact craters. Next step will be to buy some fortifications, put a lip around the board to contain the sand, look into how to make water effects with gel, and working in some proper crater effects. The block house is nothing but a packaging insert from my digital camera box. But hey - looks pretty good. I have to find a way to show casualties without the bases making it look dumb. Time to clip some soldiers from their bases? How sad.
Heroclix
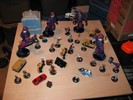
As testament to just how badly I needed a cabinet like this, I've thrown out two complete Heroclix cities I constructed out of foam board because I had nowhere to keep the buildings. So this time I'll build 'em to last. But I couldn't resist breaking out the HC to recreate one of my favorite themes from the comics: attack of the sentinels!



 It occurred to me that one area I had left to me in my cramped garage was vertical space. I kept working over this idea of a simple system of horizontal slats onto which I could slide plywood sheets, allowing me to stack them all into a secure cabinet. I could create detailed dioramas that wouldn't have to be dismantled over and over every time I had to do something in my garage. So in a mad-scientist frenzy I picked up a bunch of wood stripping and screws, retreated to my garage, put on the Dark Knight soundtrack, and went to town.


